fbpx

Walk into almost any gym at any time, and you’ll inevitably find someone on a treadmill, elliptical, or stationary bike putting in the minutes or miles at a constant, steady pace.

The world of state state training at low to moderate intensities has been a part of training programs and fitness for generations. For groups like endurance athletes, the military, combat athletes, and more, it’s traditionally been the single biggest part of their training.

And yet in the last decade or so, there has been a shift away from the “low and slow” approach to fitness and conditioning towards the HIT model. Miles on the pavement have been replaced by 20 second sprints for only a few minutes of total work.


Proponents of higher intensity training point to research like the infamous Tabata study to support the idea that if you go hard enough, you only need minutes of hard work instead of hours.

But is this true?

Is high intensity interval training that much more effective than lower intensity steady state work? Is there any reason to do lower intensity work at all?

The answer is that all things being equal, higher intensities absolutely put the body under more stress than lower intensities. This higher level of stress then causes a greater reaction by the body.

So yes, in the short run, more stress does equal faster results.

In the long run, however, nothing is for free. There is also a cost to the higher level of stress that comes with higher intensities.

Both research and the real world show that the faster you get results, the faster you’ll also be likely to hit plateaus.

Even the Tabata paper showed that the high intensity group didn’t see any real improvements in their VO2 max throughout the entire second half of the 6-week study.

The lower intensity group, on the other hand, saw steady and consistent improvements throughout.

And as we’ve already covered, any time you have more stress than you can recover from, bad things happen.


The truth about the high vs. low intensity debat is that there shouldn’t be a debate at all. It’s not a question about which one is more effective.

They both play an important role no matter what your training goal may be.

The only real question is about how you incorporate them both into your training plan. That’s where the Morpheus blue zone can help you

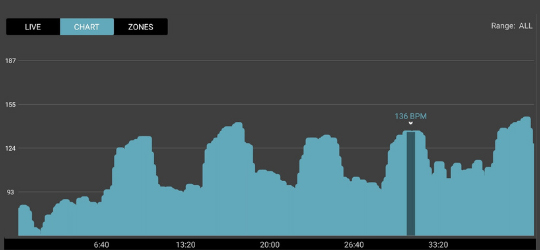
Training in the blue zone

The Morpheus blue zone is where you’ll spend the majority of time when you’re doing steady state work. This type of training can also be called cardiac output since one of the main goals is increasing how much blood and oxygen your heart can pump throughout your body.

There are several areas that higher volume, lower intensity training in the blue zone can help you with:

  • Build your overall aerobic fitness
  • Increase your average HRV and
  • Lower your resting HR
  • Promote faster recovery between workouts
  • Create a foundation to support higher intensities
  • Help develop more efficient movement patterns

There are two general ranges within the blue zone you’ll want to use when doing this type of lower intensity work.

  1. SS1 – Middle of the blue zone
  2. SS2 – Top of the blue zone

The middle of the blue zone is where you’ll want to do most of your steady state work if you’re starting with a lower level of fitness and/or your recovery for the day is on the lower end.


A good guideline is that if your average HRV is below 70, or your recovery score is below 80% for a given day, the middle of the zone is a good target.

This should generally be at what’s called a conversational pace, meaning you could carry on a conversation while you’re training at this level.

If you have a higher level of fitness, average HRV above 70, then you can up the intensity of steady state work a bit by training more towards the top of the blue zone.

Blue zone exercises

One of the things people complain the most about when it comes to steady state work is that it’s boring. Doing the same thing over and over and over again can definitely be that, but there’s no reason that this is how you have to do your lower intensity work.
First of all, even though it’s referred to as steady state does not mean you have to go at the exact same speed the entire time you’re doing it.

You can alternate between the middle of the blue zone, up to the top, and back down, for example. The most important thing is simply getting in enough time at the lower intensity heart rates.

You do not have to make it boring by staying at the exact same pace from start to finish.

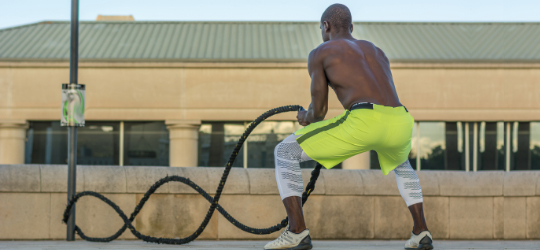
The second thing is that you also don’t have to do the same exercise the whole time either. There’s a wide variety of exercises you can do in the blue zone:

  • Running
  • Jumping rope
  • Swimming
  • Bicycling
  • Sled dragging
  • Elliptical
  • Rower
  • Medicine ball circuits
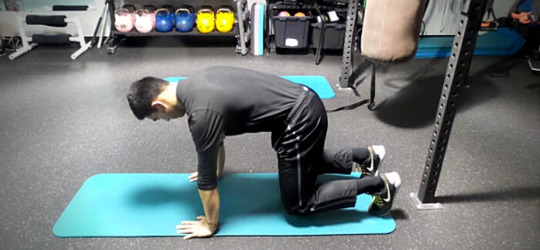
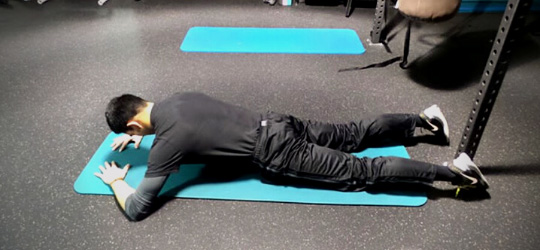
  • Bodyweight calisthenics

There are even benefits to doing different exercises in a circuit, alternating every minute or two, if you like. The benefits come from just spending time at lower intensities, exactly what exercises you do, or how you do them, is less important.


So if you find jumping on a treadmill or bike for 20-30 minutes boring, then don’t do that. Give yourself a circuit of 4-5 different exercises, spend 1-2 minutes on each, and rotate through until you’re done.

How much time should you do steady state training?

On the lower end, even 15-20 minutes of this type of work can promote recovery.

For general aerobic fitness and conditioning, anywhere from 30-60 minutes or more in a workout can be necessary, depending on where your fitness level is now and where you want it to be.

If you’re on the lower end of the fitness spectrum, 2-3 days per week of 30 minutes can make a huge difference. As your fitness increases, you’ll need to start doing more of it to continue to see progress.

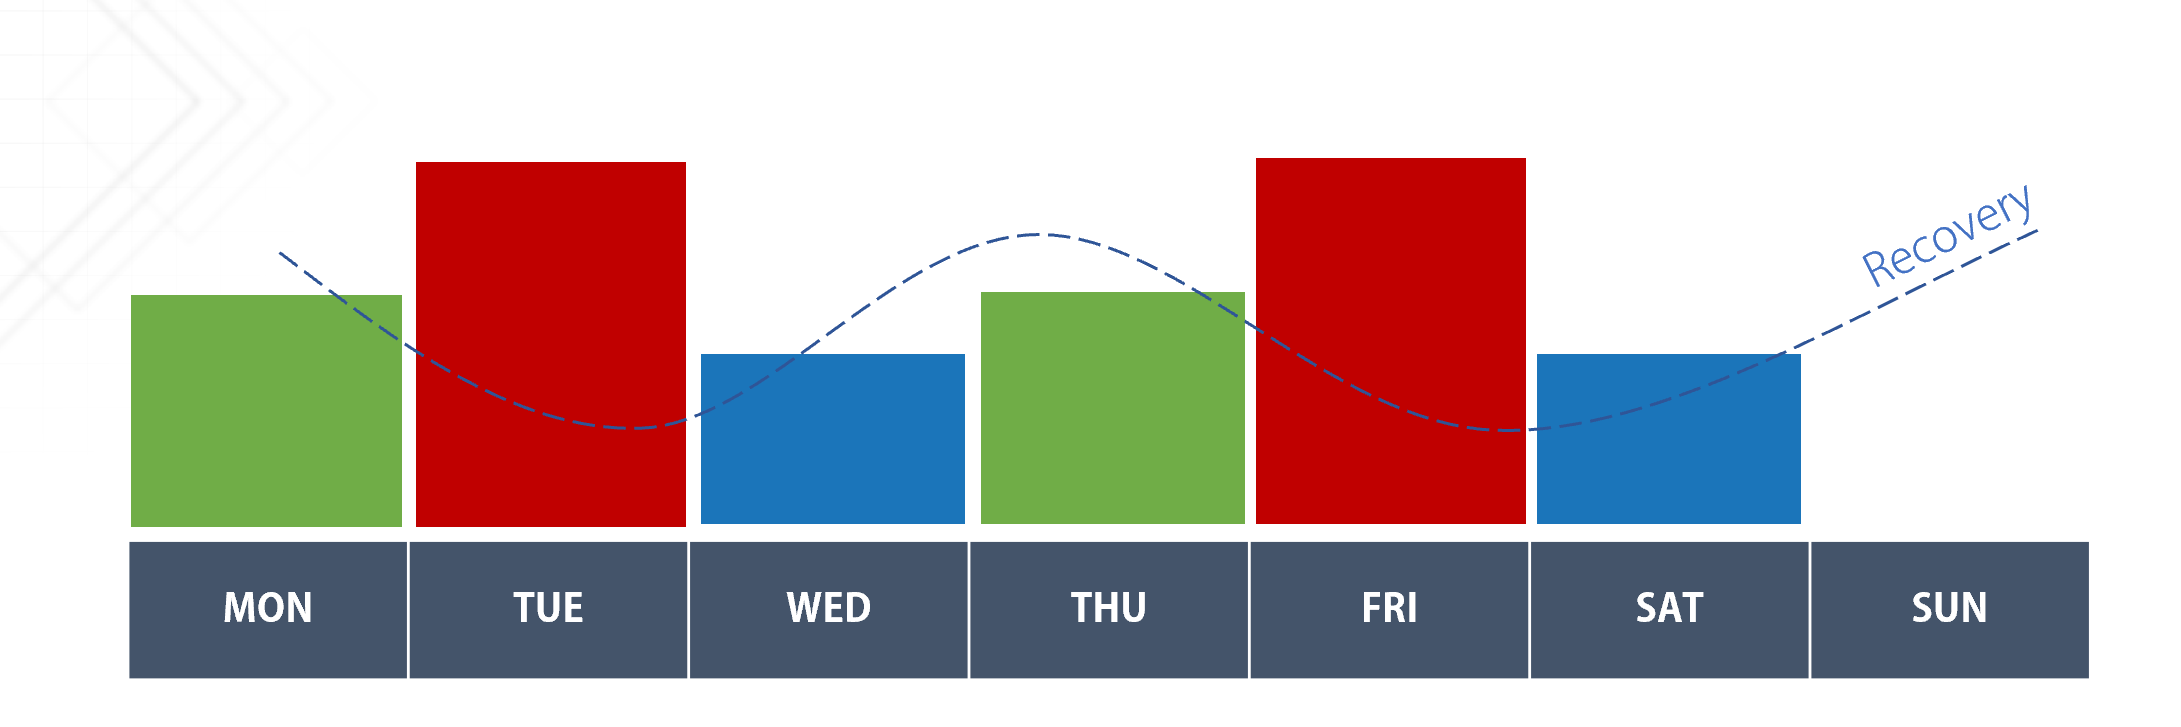
In the big picture of fitness, you should think of lower intensity, steady state work in the blue zone as the counterbalance to the higher intensity work you do in the green and red zones.

Together, training in each of the three zones using different methods will help you build your fitness step-by-step and keep you moving towards your goals without getting stuck at plateaus or being plagued by nagging injuries.

Action step

Starting in your lower blue zone and training until you hit the top of the blue zone is a great way to learn what low-intensity training should feel like. And it’s also an easy way to warm-up before your workout.

Try it out during your next training session.

For the most part, when people start a new training program or diet, they see changes quickly. Their strength goes up, the weight on the scale goes down. Everything feels like it’s working.

The problem is that sooner or later, results slow down. Eventually, they grind to a complete halt.


When this happens, people usually do one of three things.

  1. They double down and up the intensity, cut calories back even more, and keep going.
  2. They change to a completely different program or diet and hope it works better than the last one.
  3. They get frustrated, start missing workouts, see even worse results, and eventually just quit working out completely.

None of these are recipes for achieving long-term results or goals. They’re a big part of the reason why most people ultimately fall short of looking, feeling, or performing at the level they want to.

The hardest part of fitness isn’t figuring out how to see results for a few weeks, or perhaps a month or two. It’s being able to see results week after week, month after month, year after year.

The Train, Recover, Repeat model

By now, it should be clear that the single most important piece of training, and fitness in general, is finding the right balance between stress and recovery.

The reason the three approaches above most often fail is because they aren’t designed with that in mind.

You can only up the intensity, or jump from program to program, for so long before the limiting factor is not how hard you train, or what exercises you do, but how fast you can recover.

The train, recover, repeat, model of fitness is the answer to that problem because it’s built to work with your body, rather than fight against it.

It’s designed to help you balance the stress of training (and life) with recovery in a way that is sustainable and leads to long-term results.

The core principle of the model is to build your weekly training plan around three different types of workouts.

Red workouts


Red workouts are where you hit the highest intensities and volumes. If you’re doing conditioning, you’ll push yourself up into the red zone and burn the most calories.

On the strength side, these are the days where you’ll do your lower body and total body lifts that leave you tired and sore at the end. If you’re an athlete, these are your hardest practices and games.

By the time you’re done with a red workout, you know you’re going to be feeling it the rest of the day, and probably tomorrow too.

You should see a decrease in your recovery score on Morpheus of 12-18%, or sometimes more, after a red workout.

Green workouts


A green workout is a step below red, but still a challenging workout. Here, you’ll get up into the green zone, or maybe even the red zone for a few minutes, but you won’t push yourself to your limit.

You’ll generally stay below 90% of your 1RM if you’re lifting and include more upper body and accessory type exercises. You should expect to feel tired by the end of the training session, but not exhausted.

A green workout will show up with a decrease in recovery score of around 8-12%

Blue workouts


A blue workout is where all the recovery workouts discussed in previous lessons will fall. Generally low to moderate intensity, usually no more than 30-40 minutes, with the majority of the time spent in the blue zone.

You don’t have to follow the exact template of the recovery workouts, but you should stay within those general guidelines.

You should see an increase in your recovery score from 3-5% of or so on Morpheus after a blue workout.

Building your training week

Using the framework provided by the three types of workouts above, there are endless ways to build your training week.

The single most important principle in the Train, Recover, Repeat model is to alternate periods of loading stress on your body through training, with periods where you allow it to fully recover.

A single period of loading and recovery is called a stress-recovery cycle.

Each week, your goal should be to use 1-2 of these cycles to push your body to increase its fitness, and then give it the time to do exactly that through recovery.

This is how you balance both sides of the equation and create a sustainable way to make consistent progress towards your goals.

Two of the easiest and most effective ways you can build your training week around this concept is the 1/2/3 and 2/2/2. Both have up to 6 total days of training per week, but they vary in how they’re organized and the patterns of the stress-recovery cycle.

The 1/2/3 weekly model


The 1/2/3 weekly model is a great option for people that are just training to look and feel their best, while staying healthy.

A single red day on Thursday, followed by either blue days, or even days off, over the weekend, makes it extremely flexible for people with busy schedules and stressful daily lives.

The 2/2/2 weekly model


For people with higher levels of fitness that generally have things like nutrition, sleep, and lifestyle stress managed well, the 2/2/2 weekly model is a highly effective approach.
It allows for two red days spread throughout the week, while still allowing enough time for full recovery before the start of each week.

General guidelines

Exactly what you do for each workout in terms of exercises and training methods is completely up to you and depends on your fitness level, goals, and available equipment.

To help give you some ideas, I’ll cover a variety of Morpheus training methods that can be plugged into the different training days over the next few lessons.

The following guidelines can also help make sure you’ve got your weekly program dialed in:

  1. Your average daily recovery score in Morpheus should help you decide how many red days you can do in a week and still recover. Your goal should be to keep your average above 80%.
     
    If you can follow the 2/2/2 model and keep your average recovery score above 80%, then you’re on the right track. If you can’t, then the 1/2/3 or another variation with less overall intensity will be a better fit for you.
  2. It’s generally best to avoid more than 2 red days in a row as much as possible. This leads to a high level of fatigue that requires at least 2 days of recovery to prevent the potential for increased injury and burnout.

  3. The goal should be to start each new training week without any residual fatigue from the previous week. This prevents the accumulation of chronic fatigue that puts the body into a state of overtraining/under recovery.
     
    A good way to know you’ve done this is if you wake up Monday morning with a recovery score above 85%.

Action step

If you’ve been using Morpheus to track your workouts, take a minute to look at your changes in recovery score after each workout and map it out on a weekly calendar, or even better, turn it into a graph in a spreadsheet.

This is a good way to visually see your daily training stress to get a better idea of whether your weekly plan is effectively balancing your stress and recovery.

While supplements aren’t replacements for quality sleep and movement, they can be useful tools to round out your overall recovery plan.

Because there are many roads that lead to better recovery—from reducing stress, to sleeping sounder, to reducing inflammation, etc.—there are many categories of recovery-boosting supplements to choose from.

In this lesson, we’ll focus on three of the most well-documented in the following categories: anti-inflammatory, adaptogenic, and relaxation-promoting.

Anti-inflammatory


As we’ve covered in previous lessons, short-term inflammation isn’t a bad thing. In fact, it’s a necessary part of the training/adaptation process.

But when your body is chronically inflamed, it’s important to turn that pathway off to promote your parasympathetic, rest-and-recovery system.

One supplement that’s particularly effective at this is curcumin, which is derived from turmeric.

Research consistently agrees that curcumin notably reduces inflammation in all bodily systems and reduces osteoarthritis symptoms.

Since curcumin isn’t well absorbed by the body on its own, many brands combine it with ingredients like lipids or black pepper extract to increase absorption.

We highly recommend using examine.com to research and learn more about what doses are the most effective for each brand.

Adaptogenic


Adaptogens are herbal pharmaceuticals that directly and indirectly affect mood states, cognition, sleep, and brain health—all very important for managing stress and boosting recovery!

One of the most researched adaptogens is rhodiola rosea, and for good reason. Ample evidence supports rhodiola supplementation as a potent way to reduce stress-related fatigue and weariness, and even boost mood.

For preventing fatigue, evidence suggests that doses as low as 50 mg/day of rhodiola can be effective.

If your goal is to actively reduce existing stress and fatigue, doses of 288-600 mg/day are more commonly used in research.

Remember, monitoring your stress levels with the Morpheus recovery score can help you decide if you should preventively protect against stress or more actively manage it.

Relaxation-promoting


If you’re grappling with mental stress, being able to relax is crucial to shutting down your sympathetic ‘“fight or flight” response and promoting recovery.

We covered several mental performance strategies for releasing stress and refocusing in the lesson on relaxing your brain. That’s one line of defense against mental stress.

Another promising tool for relaxation is supplementing with L-theanine.

Multiple studies support that L-theanine, amino acid found naturally in tea leaves, notably boosts relaxation and has the potential to stimulate deeper, higher-quality sleep.

Common doses for these stress-fighting effects are between 100-200 mg/day.

Because L-theanine promotes relaxation without sedative effects, people often consume it with caffeine to feel alert without the jitters.

So, you don’t necessarily have to skip that coffee to enjoy the calming benefits of L-theanine.

What about other supplements?

Think of this as a well-researched foundation for you to build off of. There are many other supplements that can bolster recovery based on your specific deficiencies, goals, and needs.

An excellent tool to help you personalize your supplementation strategy is examine.com.

Think of it as a supplement encyclopedia. You can search and see how well-supported each supplement’s benefits are by research, what doses are most effective, what downsides, risks or drawbacks supplements have, and many other key details.

Like all of the strategies covered in these lessons, we encourage you to incorporate, adapt, and disregard our suggestions until you’ve discovered your favorite, go-to recovery arsenal.

Use Morpheus as a guide to what’s working as you monitor your recovery score through this process.

Action Step:

Check out examine.com and search for one of the supplements we discussed in this lesson.

If they seem like a good fit for your recovery plan, make sure to order from a high-quality source.

These sources will show scientific validation from a third-party and independent testing for purity and quality.

Some examples include:

  • Thorne
  • Douglas Labs
  • Pure Encapsulations
  • Designs for Health

The use of compression therapy generally falls into two categories.

The first is the professional range of boots and pneumatic compression boots, the most popular of which is Normatec.

Although this type of compression has been used in the ranks of professional athletes for many years, the high price tag made them impractical for most people not making a living with their bodies.

These days, their use has become a bit more widespread in the general fitness world, however, due to increased competition and big drops in price. Products that used to cost several thousand US dollars can now be had for between $500-$1000 USD.


Not inexpensive by any means, but closer to affordable for people that routinely spend hundreds (or thousands) of dollars on supplements, gym memberships, massages, personal training, and more.

The other category of compression gear is much less expensive and consists of compression garments. You can find compression gear for pretty much every part of the body, ranging from tights, to socks, shirts, arm sleeves, and more.

Though an entire medical-grade range of compression gear exists to treat specific medical conditions, most of the commercial gear marketed towards the fitness and performance market does not deliver the same level of compression.

Does compression therapy actually work?

Regardless of the type or category of compression therapy, the general mechanisms behind how it works are largely the same. Compression of the walls of your veins help them drive blood back to the heart and increase overall circulation.

Boots like Normatec use a pneumatic system to compress your legs in stages as you sit there and relax. Typical sessions range from 15-20 minutes.

Though there has not been an extensive amount of research done on this type of compression, there is enough evidence that they do, in fact, increase blood flow and circulation that can lead to reduced soreness and even increased range of motion.

It’s important to keep in mind, however, that much of this type of research is comparing the use of compression boots to a control group that does nothing to promote recovery.

Compared to being inactive, there is no doubt that driving circulation and blood flow with compression boots will likely have a benefit in recovery.


What is less well-documented, on the other hand, is whether or not the use of compression boots is any more or less effective than more active forms of recovery and regeneration like we’ve covered in previous lessons.

What about compression garments?

A good amount of research has tried to answer the question of whether or not wearing compression garments can actually improve performance and/or recovery, with mostly mixed results.

The majority of studies done in this area have focused on runners and endurance athletes to gauge whether or not wearing compression gear increases time to exhaustion and/or overall performance.

For the most part, little to no noticeable changes in this area have been seen in athletes wearing compression gear vs. those that are not. A large study funded by Nike showed no difference in fatigue after 30 minutes of treadmill running at 80% of max effort.

So performance… probably not.

For recovery, however, things are a bit more promising.

In this area, there is both evidence and anecdotal support that adding the right amount of compression post-workout can help aid in reducing soreness, reducing the buildup of metabolic waste products, and improving overall circulation.


The key here is that the right amount of compression is used. Too little has no real impact and too much may actually restrict blood flow.
The level of compression is measured in terms of millimeters of mercury. The level of compression supported in the research is 20-30 mmHg.

More than 30mmHg may be too much and less than 10mmHg is likely not enough.

This is why it’s important to do your homework before spending your money on compression gear. Many of the more popular brands do not post their level of compression.

When to wear compression gear

Although wearing compression gear during a high-intensity workout likely won’t improve performance or make you stronger, some people report feeling better with it on. There’s no real downside, and wearing it in the few hours afterwards may have a positive impact.

A particularly good use for high-quality compression gear is during and after a recovery workout. Here, the overall workout is at lower intensity and the major goal is to increase blood flow and overall circulation.

It makes sense that adding in a compression layer during and in the hours after this type of workout may enhance some of the benefits of this type of training.

Another good use of compression gear is if you have any level of chronic venous insufficiency (CVI), a condition where the vein walls and valves don’t effectively return blood back to the heart as well as they should.

This condition is more common than most people think, particularly in populations older than 40 years old. Common early signs include varicose veins in the legs and swelling of the ankles.

There are varying degrees of CVI, ranging from very mild to severe, and even the most mild cases can impact lower body performance and recovery. Research suggests up to 40% of the US population exhibits early signs, such as varicose veins, and somewhere between 2-5% likely have clinic level CVI.

Finally the use of compression socks and tights may be beneficial during long flights and times where you’ll be immobile. This is because they can help prevent the pooling of fluids while you’re seated for several hours or more and combat some of the physical effects of jet lag.

Taken as a whole, garments that offer between 20-30mmHg of compression are reasonably inexpensive, require no additional time or work to use, and likely provide some level of benefit.

This is particularly true when used during and after recovery workouts, when traveling, and/or if you have any degree of CVI that inhibits circulation throughout the legs to begin with.

Action Step

Some people report feeling a noticeable difference when wearing compression garments so if you’ve never tried them before, it can’t hurt to give them a shot for yourself. The easiest way to do this is by wearing a pair of high-quality compression socks.

The brand 2XU is one of the few top brands that allows you to search and sort by the compression level of their products. Less expensive can also be found on Amazon as well.

The use of electric muscle stimulation (EMS) is widely used across a range of health and fitness disciplines, from physical therapy and rehab, to high-level, athletic performance.

Historically, the use of EMS for increasing performance in athletes has been more popular throughout Europe and other parts of the world than the US. The former Soviet Union, in particular, began extensive research into the practical application of EMS to improve performance as far back as the 1970s.

A variety of bold claims have been made about various EMS devices, including that they can:

  • Increase muscle strength
  • Stimulate muscle growth
  • Improve explosive power
  • Increase blood flow and circulation
  • Decrease muscle soreness
  • Prevent muscle wasting
  • Enhance recovery
  • Improve speed
  • Accelerate rehabilitation
  • Decrease pain

Before we get to the answer of whether or not EMS can actually do any of those things, it’s important to take a second to talk about how it works in the first place.

How does EMS work?


To understand EMS, you just have to know that your muscles contract via an electrical signal sent from the brain to your muscles through the nervous system.

EMS hijacks this process and sends an electrical signal through the skin to the muscles directly. This means they contract in much the same way, though not exactly identical to how nature does it.

Different kinds of EMS devices use different types of current, frequencies, amounts of power, and types of electrodes to make contact with the skin and cause the muscles to contract.

Clinical models used in physical therapy clinics can be several thousands of dollars. On the other side, you can find small, low power models for as little as $50 at mall kiosks and retail stores.

In short, all EMS units are not created equal and this is an extremely important thing to be aware of.

What about TENS?

Aside from EMS devices, you may have heard about TENS. Both TENS (transcutaneous electrical nerve stimulation) and EMS use electrical currents through the skin, but EMS uses a stronger current to stimulate muscle contractions.

TENS, on the other hand, targets specific nerves to reduce pain signaling to the brain. It’s most commonly used in physical therapy, surgical recovery, and rehab.

While both TENS and EMS can stimulate nerves to help relieve pain, EMS is what’s most often used in the realm of fitness and performance.


Does EMS work?

The most accurate answer to whether or not EMS works and is worth using is that it depends.

This is because first of all, there is a wide range of EMS devices out there. Some can be extremely effective, while others are little more than a gimmick.

Expect to pay a fairly high price to get a good EMS system. If you do want to use EMS in your program, my two brand recommendations are Compex and Globus.

Compex has a broad selection of devices that are designed to be user friendly. Their wireless models also eliminate the traditional issue of having to be connected directly to the power units.
Due to FDA regulations, you’ll find the selection of Compex units available on the USA website far more limited than in many other countries. Many of their high end models are not available to order directly, so you may have to get a bit creative if you’d like to get your hands on one.


Globus, on the other hand, is a less well-known brand from Italy that’s also branched out into athletic performance. They have a range of models aimed at different sports and their prices tend to be on the higher end.

Overall, their devices are not as user-friendly, and they lack a wireless option. That said, they also offer a wider range of options and programs in their devices and they’re also some of the most powerful available outside of the medical industry.

Can EMS speed up your recovery?

How effective a good EMS system is at improving recovery depends on what you’re comparing it against. Compared to being inactive and doing nothing in between workouts, using EMS can have a noticeable benefit.

Compared to incorporating things like recovery workouts, regeneration strategies, and activities that require movement, research suggests that by itself, EMS is generally not as effective.

Stimulating muscles with electric current is better than not simulating them at all and can have benefits, but it’s not really the same as doing it the old fashion way.

Where EMS can be extremely effective is for returning after an injury.

It allows you to get blood and fluids into tissues surrounding the injury, while stimulating the nervous system to active muscles that may have been inactive during the healing process.


Overall, EMS is probably the most beneficial for people that would otherwise not do anything active for recovery. If you’re not going to incorporate recovery workouts and get in a good amount of overall activity each day, then 15-20 minutes of EMS is a good alternative.

It’s also beneficial if you’re constantly traveling and/or dealing with injuries that prevent you from training consistently. Here, adding in EMS can speed up your rehab time and help you get in some additional muscle activation when you can’t get to the gym.

Finally, there’s no reason you can’t use some EMS as part of your training itself. It can be used pre-workout as part of your warm up, for example. Some models even make it possible to do various exercises at the same time with EMS on.

So while EMS is not a replacement for moving or training, it can still be a valuable tool when used for the right purposes and with the right expectations.

Action step

If you’re going to buy an EMS system, make sure to do your homework. It’s much better to invest in a high-quality system than buy one that’s inexpensive, but also ineffective.

Whether you wake up with an icy shower or have seen any videos of Wim “The Ice Man” Hof, someone has probably told you that cold plunges are great for your health.

Anyone who’s jumped into cold water understands the enormous jolt of energy and endorphins that immediately surge through your body.

But what is cold water immersion (CWI) actually doing for you? And where does it fit within an intelligent recovery plan?


Like all other recovery/regeneration methods, the how always comes back to the autonomic nervous system. Remember, this is made up of the sympathetic “fight or flight” and parasympathetic “rest and recover” systems.

When you initially jump into frigid water, the “cold shock” response is classic sympathetic system at work: your heart races and your blood pressure skyrockets as your vessels constrict.

That voice inside your head that tells you to “GET OUT OF THE WATER,” is a full-blown flight response. Being freezing cold is stressful.

If you are too cold, for too long, you can die. There are very real survival mechanisms that get turned on when you jump in icy water.

One of the main things that quickly happens is your core temperature is lowered and your blood vessels contract to drive blood to your heart, lungs, and other organs. This can help stimulate the immune system, reduce pain, and decrease inflammation.

It sounds like CWI is a perfect recipe for recovery, but there’s a catch…

When to use CWI… and when not to.

Inflammation, just like stress, isn’t always a bad thing. In fact, your inflammatory response is actually part of a signaling pathway that tells your body to adapt and improve after your workouts.

It’s a big piece of how the body knows that tissues have been stressed and need to be repaired. It’s through this repair process that they become more fit.

So, here’s the catch with CWI…

On the one hand, using CWI immediately after workout has been shown to have an impact by quickly reducing core body temperature and causing a faster restoration of explosive power and strength back to baseline levels.


Sounds like a good thing, right?

The problem is that at the same time, when you dampen your inflammatory response right after a workout with a cold shower, bath, or float (especially if you do this repeatedly), you run the risk of decreasing your body’s signals to improve.

In other words, the cost of the short-term recovery benefits is that they may interfere with the potential long-term benefits of training.

Research has shown this to be particularly the case when it comes to trying to build bigger, stronger muscles.

That means that whether or not you should use CWI after a workout, practice, or game, depends on the situation.

If you’re training twice a day or have a limited amount of time to recover before you have to train or perform again, it can make sense to use CWI to help speed up recovery.


If your HRV and recovery scores in Morpheus are showing that you’re heading in the wrong direction, particularly if you’re seeing your HRV persistently higher than normal, it can be valuable to use CWI to tamp down inflammation and give your body a recovery boost.

In this case, the benefits can outweigh the potential costs.

But if your recovery is generally where it needs to be and you can control when and how hard you train, it’s generally best to avoid finishing your workout or practice by jumping in an ice bath.

What about a morning shower or plunge?

A morning cold shower or plunge is much less likely to have an impact on your training from the previous day.

Here, the primary benefits are likely the feeling you get from the endorphin rush (many people report an overall improvement in mood), and the potential for a boost in immune function.

So, if you enjoy incorporating some form of cold into your daily morning routine and it makes you feel better, chances are good that it’s helping you.

The key is to recognize that just like anything else, your body will get used to cold exposure. If you do it every single morning, it will lose its effectiveness. Cycling through periods of doing it and taking a break is a good way to maximize the benefits.

How cold and for how long?

Just like with training, we can think of the stress of CWI in terms of volume and intensity. The “intensity” is the water temperature and the “volume” is how long you stay in it.

And just like with training, the key is to start off with less volume and intensity and only build up to more as necessary.

If you use too much, the cost of the stress will outweigh the benefits, no matter when you do it.

A general recommendation for water temperature range based on the research is between 12-14° C (54-57° F). When it comes time, anywhere from 10-17 minutes of total exposure within those temperature ranges is common.

Always keep in mind that the colder the water temp you use, the shorter the total amount of time you need to be in it to have the same benefits.

It’s also important to consider that total body immersion, particularly if you put your head under water, is a much higher level of stress than a cold shower.

As always, the devil is in the dose. Monitoring your HRV and recovery with Morpheus can help you make sure you’re on the right track.

Action step

If you’ve never tried any form of CWI, a cold shower is the easiest way to get started. Even just a minute or two in the morning can help your body build tolerance before you take the next step.

Monitor your HRV closely using Morpheus, especially during prolonged periods of stress. If you start to see signs of parasympathetic overreaching, try using CWI to get back on track.

By mental performance coach Brian Cain

As someone who cares about fitness, you know the importance of what happens inside the gym; but a huge part of recovery for optimal performance takes place outside of the gym, inside our heads.

Developing strategies to “turn off” the stress response and shift into recovery mode gives you a massive advantage in today’s intensity-driven, grind-or-die culture.

Plain and simple, managing stress is key for personal fitness success, whether that means losing weight or setting a PR.

Mental stress takes up a lot of your limited energy reserves and sabotages recovery. Ultimately, it limits the level of results you’ll see from the work you put in at the gym.

If you don’t address the mental side of recovery, it won’t matter how intelligent your programming is or how hard you’re willing to work; your health, fitness, and performance will suffer.

It’s THAT important.

That’s why I want to share a simple, 4-step process you can use to combat stress.

This is the same process I use to help world-champion UFC fighters stay calm in the cage, winning pitchers release stress and stay focused on the mound in front of millions of people—and you can use it to manage your day-to-day stress.

The 4-step process to turn off stress, ramp up recovery, and get better results


Step #1: Recognize

That which you’re aware of, you can change. That which you’re NOT aware of, you can’t do anything about.

The first step toward combating stress in your life is to recognize when and where it’s happening so you can begin to DO something to offset it.

To provide a concrete, visual of how you can heighten your awareness and become more attuned to stressful situations, I use a process called “recognizing your signal lights.”

This idea of “signal lights of stress” is just like driving a car.

If you’re driving your car and you come to a green light, you GO. There isn’t any thought process, you just go. But if you’re driving your car and you come to a yellow or red light, you slow down and STOP.

You can use this same concept to evaluate your stress levels, and if necessary, stop it in its tracks, turn it off, and get your body back into balance.

Simply becoming more aware of when your stress levels are rising to a yellow or red level is a great place to start, but I want to give you a method I use to help identify your signal lights, called “BFS.”

BFS is an acronym that stands for body language, focus, and self-talk.


By evaluating these three components, you can get a clear idea of whether your stress levels are a green, yellow, or red light. Let me roll through an example for you…

Body Language: In a green light situation (where stress is low), my body language is big, strong, my shoulders are back, head is up; I feel good, in control.

In a yellow or red light situation⁠—where stress is building or at a point where it’s negatively affecting health and performance⁠—my body language is small, my shoulders are slumped, back is tight, I just feel stiff.

Focus: In a green light situation, I’m in a state of present awareness where I’m dialed in on what I’m doing right now and why it’s important. In a yellow or red light situation, my focus is on the past or on the future; it’s on outcomes, not the process.

Self-Talk: In a green light situation, self-talk is often third person and confident: “You’ve got this.” In a yellow or red light situation, self-talk is usually third person and it’s negative: “I can’t believe you did that, you always make these kinds of mistakes.

Your body language, focus, and self-talk are like a temp gauge for your stress levels. If more than one of these is trending toward a yellow or red light situation, you have to be able to recognize that and put a plan into place to turn things around—we’ll get to that in a minute.

For now, I want you to practice becoming more aware of your BFS so you can identify where your stress levels are at. This can take time, but it’s well worth it. With time, being able to instantly evaluate your “BFS” will become like second nature to you.

Use the “BFS” process to evaluate where your signal lights of stress are at:

  • If you’re hitting green lights: Keep cruising.
  • If you start hitting yellow and red lights: STOP — and apply the “release and refocus” process we’re going to cover next…

Step #2: Release


When you recognize a yellow or red light with BFS, you need to immediately go into a release routine to turn off the stress response and get back into recovery mode.

Your 3-step release routine is to:

  1. Do something physical.
  2. Take a deep breath on a focal point.
  3. Have a verbal trigger.

Step #1: Do something physical. The idea here is to take a physical action that initiates your release routine. This might be clapping your hands together forcefully, taking a piece of paper and throwing into the garbage can.

Step #2: Take a deep breath on a focal point. A focal point is a spot you look at while taking a deep breath that reminds you to come back to the present moment.

You could use a sticky note on your desk or computer with the word “focus” on it. Maybe you focus on the watch on your wrist to remind you to focus on the present moment. The options are limitless, but the idea is the same: find something you can use to come back to the present moment and “go green.”

Step #3: Have a verbal trigger. The verbal trigger is the final signal that releases us from the stressful situation, knocking us back into recovery mode and bringing us back to the present moment.

Your verbal trigger could be as simple as saying the word “release,” to indicate letting go of the stress you’re experiencing.

Or, maybe you’ll say “recover” to tell your body and mind, “Hey, we’re letting this stress go and getting back into a state of recovery.”

The most important thing is to choose a verbal trigger you can remember that will effectively get you back to the present moment.

Putting this all together:

Any time your BFS indicates that your stress is at yellow or red light levels, immediately go into your release routine: do something physical, take a deep breath on a focal point, and say your verbal trigger.

Step 3: Refocus


When you recognize a yellow or red light, you immediately go into your release routine. The final step in the process is to refocus. Let’s now talk about two steps in training your refocus:

  1. Take a deep breath on a focal point.
  2. Have a final thought, image, or feeling, or what I often call a TIF.

First, take a deep breath. When you finish the release routine we outlined in step 2, you simply take a deep breath to focus on what you’re going to do next.

You’re essentially resetting—or refocusing—your body and your mind to be in a state of focus and relaxation.

Finally, you complete the process with a final thought, image, or feeling that helps you refocus on being in a peaceful, green light situation.

This could be thinking about how confident you’ll feel if you make the difficult, healthy nutrition choice; or feeling what it will be like to sink the game-winning free throw.

The idea is to choose a final TIF that will help release the stress of that situation and refocus what’s going to get you back to a place of peace and recovery.

Step #4: Repeat


This one’s simple, but not necessarily easy — repeat the process any time you’re feeling stressed and overwhelmed, or when your BFS indicates your stress levels are in a yellow or red light situation.

With practice, you’ll discover applying this process is something you can do in just a few seconds—and it’s something you can literally use over and over again throughout the day.

Over time, the compound effect will kick in, often leading to life-changing results.

Action Step

By applying the stress-release process you’ve learned today, not only will you be able to improve the ability to turn off stress and get back into recovery mode, you’ll also notice that you’re able to stay calm under pressure and make better choices.

Take a moment to identify your BFS signal lights, write out a 3-step release routine, and choose a refocusing TIF.

Play out how you’ll go through this process the next time you’re mentally stressed.

When people go to get a massage from a therapist, it’s usually either because A) They have an injury, soreness, or pain that they want treated or B) they want to relax and reduce stress.

While both of these are good reasons, they are both reactive.

People wait until they’re injured or in pain. They let stress get the better of them and then they decide to get a massage to relax.

One of the keys to recovery, and particularly soft tissue management, is to be proactive in your approach.


The most effective strategy isn’t to wait until something is wrong to try and fix it. It’s to prevent it from breaking in the first place.

Fortunately, today, there are more self-treatment soft tissue tools than ever before. The amount of rollers, percussion devices, rollers, balls, body tempering tools, and other similar products is almost endless these days.

That makes it easier and more affordable than ever to take care of yourself. You don’t have to be a pro athlete on an unlimited budget to manage your soft tissue and improve your recovery.

Why do you need to take care of your soft tissue?

There are a lot of reasons that it’s incredibly important to be proactive about taking care of your soft tissue. The single biggest of them is that they are directly connected to both movement and recovery.

That’s because your soft tissues are what produce and transmit the force it takes to move your body. That means the more you move and the more force you ask them to generate, the more stress you’re placing them under.

Getting in the gym and training is a lot of stress on virtually all of our soft tissues because of the high forces we’re generating during a workout.

Over time, our vast network of soft tissues like muscles, tendons, ligaments, and fascia, can respond to stress in a variety of ways.

One one hand, it can cause them to become stronger, more resilient, more pliable, more efficient, and more resilient to injury.

On the other hand, stress can also lead to changes that are much less beneficial.

Changes in length-tension relationships that restrict our movements. Trigger points that create and refer pain throughout the body. Activation of our sympathetic nervous system that slows down recovery.


The way to prevent these things from happening is to be proactive about helping our soft tissues deal with all the stress we place on them on a daily basis.

When we do this, we’re able to move more efficiently, stay healthier, recover faster, and perform our best.

How do soft tissue tools and methods work?

There are a lot of things that are well-understood about massage and various treatments, and there are a lot of things that still aren’t.

The body is endlessly complex. Science can’t always answer exactly why some treatments work, but one of the key pieces of soft tissue treatment and management is applying pressure and compression into a specific area, or areas. When it comes right down to it, that’s most of what this type of work is really all about.

Pressure, in the right amount and at the right places, is an input into our nervous system that can cause changes in how our soft tissues function. That’s because it’s the nervous system that is what controls so much of how much tension all these tissues are under.

Muscles being “tight” or “loose” is much more about the nervous system than it is about the muscles and supporting tissues themselves.

So the real goal of most soft tissue treatment methods is to impact our nervous system. We want to stimulate the nervous system to reduce tension, drive blood flow, and help our soft tissues recover from the stress of life and training.

The first part of doing that is picking the right tools for the job.

Best tools for the job

To help you sort through all the options, I’ve got three personal recommendations of proven winners for you. Each represents a different price point so you can choose based on your budget, and all of them can help you effectively manage your soft tissue.

Accumobility Ball


The Accumobility Ball is one of the most versatile soft tissue tools on the market, and it’s a big step up from the traditional golf or tennis ball you have to chase around the room when it gets out from under you.

The biggest reason is because it’s stable. It’s also extremely budget friendly and easy to transport.

The primary function it serves is to provide direct pressure and compression in an effective and easy-to-use way.

It’s built to be stable on the floor or even against a wall, so the potential applications are endless.

Even better, the company has a variety of instructional videos showing you how to use it on every muscle group imaginable.

The accumobility ball comes in two densities to provide either firm or medium pressure. I recommend you get both, but if you only choose one, I’d opt for the firm pressure.

Kabuki Boomstick


The Boomstick is built around the concept of body tempering, which was invented and popularized by Powerlifter Donny Thompson.

Think of it as a deep tissue massage on steroids.

Its density allows you to apply far more pressure directly than lighter tools like foam rollers. When you combine this pressure with active movement, it can be incredibly powerful for breaking up adhesions, turning off trigger points, and restoring normal mobility.

It also works extremely well with the accumobility ball. You can use them together in what Kabuki Strength calls “The Vice Method,” to compress muscles from both sides.

Just like with the accumobility ball, Kabuki provides a wide range of instructional videos to help you get the most out of the Boomstick and all their other recovery tools.

Theragun


The Theragun is the most expensive soft tissue tool of the three, but it’s also the one that’s based on percussion, rather than direct pressure and compression. The use of percussive massage guns is relatively new in the sports and fitness market compared to more traditional soft tissue tools.

The biggest difference is that percussion, rather than more constant pressure and compression, offers another type of “input” to the nervous system than other manual tissue tools. It’s also next to impossible to replicate this type of stimulation with any other tool or technique.

Research has shown a measurable increase in range of motion, as well as a decreased feeling of soreness after use. This is likely due to the effectiveness of percussion in driving blood flow into the area where it’s used.

Another big plus is that it’s incredibly easy to use. All you have to do is run the Theragun over the areas you want to treat, so there’s very little learning curve or practice required to see immediate benefits.

There are a variety of different Theragun models at various price points. They all feature the same core percussion technology, with differences in size, features, and price point. Any of them will get the job done.

Action step

If you’re already incorporating soft tissue work into your weekly recovery program, great job. Keep it up.

If you’re not, pick one of the three tools above and start small. Begin by using it within your workouts for a few weeks and see how you feel.

You may be surprised at just how much of a difference it makes in how you feel, how you move, and how well it helps you recover.

Co-authored by Bill Hartman and Mike Robertson, founders of IFAST.

When it comes to optimizing movement and recovery, the two most crucial pieces of the health and performance “puzzle”, nothing is more important than proper breathing mechanics.

Dr. Karel Lewit once said: “If breathing is not normalized—no other movement pattern can be.

If you’re breathing poorly, everything else is going to be out of whack, at least to some extent. Proper breathing is that important.

Get your breathing right, and you have the raw materials to build upon so that every other system in your body can work together to facilitate optimal movement and recovery.

From a movement or performance standpoint, this should be obvious.

If you aren’t breathing effectively and efficiently, how can you expect to perform well in an activity where the most basic requirement is the effective utilization of oxygen?

Breathing influences movement patterns, posture, pain, as well as performance. It does this by altering the position of the musculoskeletal system, causing restriction of airflow leading to underinflation or hyperinflation of your lungs, thus creating a mechanical barrier that limits movement.

In other words, in a very real way, being able to move optimally during performance and exercise comes back to the ability to breathe effectively.


Recovery is affected in a similarly detrimental way. To really understand optimal recovery, we have to look past the muscles to the nervous system.

Recovery of the nervous system is a powerful influencer in regard to regaining the capacity to provide output to the movement system.

If your nervous system is chronically fatigued, it won’t matter how “effective” your training program is; your results will be less than what they could be.

Remember: everything is interconnected.

Put simply, as your nervous system gets more sympathetically dominant from being overtaxed, overstressed, and fatigued, your body becomes:

  1. less efficient at facilitating movement (i.e. your performance during the workout session or competition is below what you’d be capable of in an optimal physiological environment).
  2. less capable of facilitating the recovery processes after your workout session or competition ends (which means you will be walking around in a low-level state of fatigue and your performance will be compromised the next time you show up for a workout or competition—and continued for long enough, this will negatively affect overall health).

Addressing each environmental and behavioral aspect of stress is important, but if I had to establish a “hierarchy”, developing better breathing patterns would constantly be at the top.

In terms of recovery, proper breathing can shift the nervous system from its stressed, sympathetically dominant state toward a more restorative, recovery based parasympathetic state.

The good news?

You can “train” respiration just like you can a muscle or any other component of health and fitness.

Let’s talk about how:

3 simple breathing exercises to improve movement and recovery

The reality is that most people breathe ineffectively (or at the very least, less than optimally). But you can change that.

So let’s give you some tools to start training (and improving) your breathing patterns right now.

Bear Breathing


  • Position yourself on all fours on the floor
  • Hands should be directly below the shoulders and knees directly below the hips
  • Push long through the arms as if to push away from the floor until you feel a stretch between the shoulder blades
  • Bring the knees off the floor until the shin is horizontal to the floor
  • Hold this position as you take 3-5 full breaths in through the nose and out through the mouth
  • Relax and breath normally for a few seconds
  • Repeat and perform 3-5 repetitions

Wall Breathing


  • Stand with your back against a wall and feet hip width and 10-12 inches from the wall
  • Posteriorly tilt the pelvis to flatten the lower back against the wall
  • Reach forward maximally with both hands allowing the upper back to round forward
  • Hold this position for 3-5 breaths and then relax
  • Repeat and perform 3-5 repetitions

Forearm Plank Breathing


  • Lay face down on the floor
  • Place the hands below the face palm down on the floor such that they form a diamond shape with the index fingers and thumbs
  • Push through the forearms and push the shoulders forward to lift the chest and abdomen upward off the floor until weight is only on the forearms and pubic bone
  • Hold the upward position and perform 3-5 full breaths in through the nose and out through the mouth
  • Return to the starting position
  • Repeat and perform 3-5 repetitions

Action Step

The great thing about these recovery breathing exercises is that they can be used just about any time.

They’re incredibly easy to incorporate into a dynamic warm-up or cooldown, and you can even do them at home. After just a couple of minutes of doing this type of breathing, you’ll often feel noticeably looser and more relaxed. That’s because they help turn on the parasympathetic nervous system.

Try incorporating a couple of these exercises into your daily routine and you’ll quickly feel the difference.