fbpx

The new Morpheus October updates are here and we think you’ll really like the improvements we’ve made!

If you don’t have automatic updates turned on, make sure to visit the app store to download and install the newest versions.

We’ve made three changes all designed to improve the workout features of Morpheus. Give them a try and let us know what you think by posting a pic on IG and tagging us or sharing in the Morpheus FB community.

Improved workout history view

The new and improved workout history view makes it much to scroll through your past workouts and get a quick glimpse at the data, workout time, calories, and average heart rate.

You can scroll up and down to look through past workouts and if you get to the bottom of the list, just hit “view more” to bring up the full screen menu.


To dive deeper into a specific workout, just tap on the workout you want to view and it will take you to our new all-new workout summary reports

New workout summary report

The updated workout summary report includes a more complete look at all the details of each and every workout, as well as a new landscape view that lets you view your heart rates at two different times throughout the workout.

You can get to the all new report by completing a workout in the app, syncing a workout from the M7, or through the workout history view as discussed above.

In the updated report, you’ll find additional statistics, better workout graphs, a list of any zone-based intervals completed in the workout, as well as the new landscape view.

To get to the landscape view, simply swipe the top section to get to the graph view and click the small arrow icon in the upper right corner. This will then open the landscape view where you can view any two points on the graph by clicking on the screen.

This is especially useful if you’d like to look at your heart rate recovery between any two points of the workout.

Once you’re done, you can close the landscape view by hitting back and it will return you to the workout summary.

Interval training updates

One of the most important features in Morpheus is the Zone-Based Interval Training (ZBIT) methods that can be found within the TRAIN screen. In an effort to increase awareness about ZBIT, we’ve added labels to the icons in the upper right hand screen that are used to configure and then start any intervals you’d like to do in your workout.

Finally, we’ve also made one small change to how the interval counter workouts. When you’re doing any of the 12 intervals, the interval counter will now display the interval number that you’re currently on, rather than the number you’ve completed as it did before the update.

This means that if you have chosen to do 10 intervals, you will now see 1/10 as soon as you start the first interval instead of seeing 0/10 until you had completed the first rep.

This is more in line with how other interval timers work and we think it will make it easier to know exactly where you are and how many you have left.

Welcome to day 1 of the Morpheus Recovery Challenge.

Now that it’s officially started, let’s talk about the rules, scoring, and how to get the win!

To get as many points as possible and give yourself the best shot at claiming the top spot, it’s important to make sure you understand how the scoring works.

There are 4 different ways to earn points:

1. Recovery score
2. Completing daily activities
2. Working out with Morpheus
3. Being consistent and hitting streaks

Recovery score

The single biggest way to earn points is the daily recovery score. Each day, you’ll earn the number of points equal to your recovery score. If your score is 87%, for example, you’ll earn 87 points in the challenge.

The higher your recovery score, the more points you’ll earn.

Scoring for daily activities:

Each day, you can earn up to 30 points by completing each of the 5 activities below. Being consistent and hitting each of these goals each day is also how you maintain a high recovery score and unlock bonus points from streaks.

7,000+ steps per day: 10pts
Sleep 8+ hours: 10pts
Sleep 7-8 hours per night: 5pts
Complete daily lesson: 10pts

Scoring for workouts:

Each calendar week (mon-sun), you can earn points for up to 4 workouts. You’ll receive 10 points for each workout, plus bonus points if you do recovery workouts.

A recovery workout is any workout that causes your recovery score to go up afterwards.

All the details on recovery workouts will be covered in an upcoming lesson, but the basic guidelines for recovery workouts are:

  • Keep your heart rate in the blue zone for the vast majority of the time
  • Workout for generally around 25-40 minutes
  • Make sure your average HR for the workout is above 100bpm
  • Have an RPE of 6 or lower.
  • You can do a variety of different exercises, it’s totally up to you.

Recovery workouts can increase your daily recovery score from 1-7%. You’ll earn bonus points based on this number.

For example, if you do a recovery workout and your recovery score increase 5%, you’ll earn 10 points for the workout + 5 bonus points, for a total of 15pts.

You can do as many workouts throughout the challenge as you like, but you’ll only receive points for a total of 4 per week.

It’s important to keep in mind that the key to workouts in the challenge is balance. If you do too many workouts and/or too much intensity, your recovery score will be lower. If you don’t do enough workouts, or all you do is low intensity, your fitness may decrease.

Throughout the challenge, you’ll learn more about the most effective ways to build training programs using Morpheus.

Unlocking bonus points for streaks

Consistency is a major key to success in fitness and an important part of the challenge. You can unlock bonus points for hitting 7, 14, and 28-day streaks for hitting the daily goals for steps, sleep, and getting a recovery score.

To get into the top spots, you’re going to need to unlock as many of the streak bonus points as possible. Not only will this help you win, being consistent will also help you build the right habits to each your fitness goals.

Tracking your scores

You can see exactly what you stand in each of these areas by clicking on the “Scoring” tab next to the leaderboard.

These scores are updated in real-time so you will always know where you stand.

Note that because we have people from all over the world in the challenge, you may see people a day ahead of you based on time zones. You’ll see what day people are on listed in the scoring tab.

What to do next

Our goal is to help you take the next step in your fitness journey by unlocking the power of faster recovery and smarter training.

Over the coming days, you’ll learn a lot more about what recovery really is, how it’s related to stress, and why the 23 hours outside the gym have such a big impact on whether or not you achieve your fitness goals.

By the end of the challenge, whether you win first place or not, you’ll know exactly how to connect all the dots to drive meaningful (and sustainable) improvements in your fitness, health, and performance.

By completing this first lesson, you’ve earned points in the challenge!

To get more, all you have to do is make sure to take an HRV measurement so you can get a recovery score, and then hit at least 7,000 steps a day before getting a good night of sleep.

Finally, before tomorrow’s lesson, your homework is to take a few minutes to write down the answer to two important questions:

1) What is your single biggest fitness goal? In other words, what motivates you to get up, go to the gym, and put in the work day in and day out?

2) What is the main obstacle keeping you from reaching that goal?

Write the answers to these two questions down because we’ll refer back to them as we progress through the daily lessons.

You’ve put in a lot of work to get here—well done!

Let’s quickly review what you’ve learned on this 30-day journey:

You began by learning the science of HRV and how it’s a powerful reflection of your recovery.

You dove into other major contributors to your health and recovery: training, sleep, movement, and nutrition.

Then, you discovered how to build new healthy habits, one step at a time.

The following lessons helped you build your recovery toolkit with specific recovery and regeneration strategies: hydrotherapies, sauna, breathing strategies, soft tissue care, mental relaxation drills, cold water immersion, compression, and recovery supplements.

This taught you exactly when to use each recovery strategy and how to perform them for maximum impact.

That’s when you studied the Train, Recover, Repeat model of health and fitness and learned how to balance your stress and recovery using Morpheus.

You continued by investigating specific training methods and how to use them to improve different areas of your conditioning and performance.

All those lessons laid a solid foundation for how to transform your recovery and fitness.

The final section helped you define why.

You used the Morpheus Recovery Assessment to examine the habits and behaviors affecting your recovery. And the results from this test helped you identify your biggest recovery limitations.

These “recovery roadblocks” gave you a starting point to:

    • Single out an outcome goal for your health/fitness


    • Set process goals to help you steadily pursue your outcome goal

Finally, at the end of the last lesson, you wrote down how you intend to track your progress, identify setbacks, and hold yourself accountable as you chip away at your process and outcome goals.

Now, it’s time to follow your well-developed plan.

The beauty of this recovery roadmap is that you can use it again and again.

Things change. Down the road, you may struggle with areas of your recovery that seem effortless now.

At any time, you can take the Morpheus Recovery Assessment again, identify a high-benefit behavior change you can make with the least amount of effort, and map out your new outcome and process goals.

This is a system for continually adapting your recovery plan as your needs evolve.

We hope you’ll use it as a framework for the methods and strategies we’ve covered in these lessons.

Thank you for following along with us over the past 30 days.

And congratulations on completing the final lesson!

In the previous lesson, you identified one area of your recovery you want to improve.

Now, it’s time to pinpoint the exact goal you should set to make the greatest positive change in your health and performance.

It’s important to understand that successful goal-setting is an actual science. If you don’t work with the brain’s natural dopamine reward system, you’ll fight an uphill battle and ultimately fail to make changes that stick.

Part of what is knowing how dopamine motivates us. Each time we predict a reward, whether it’s getting thousands of likes when we open Instagram or seeing the number go down when you step on the scale, we get a little dopamine spike.

This is important, because the spike comes before the actual reward! It’s the anticipation of something great that causes the dopamine uptick.


This is what drives and reinforces our behavior.

But what happens when we don’t get what we’re anticipating? When what actually happens falls short of our expectations?

Each time our brain incorrectly predicts the level of reward from an action, it adjusts its prediction up or down—and your motivation to take that action again adjusts along with it.

What does this mean for your fitness?

When you first start training, your brain sees very rapid progress, i.e. a big reward from the work. Your body fat quickly drops, strength grows, aerobic fitness improves, etc.

Your brain becomes conditioned to expect a big payoff from all the work. This predicted reward leads to a large dopamine spike before each workout, which strongly motivates you to work out.

The big problem is that progress is never linear.

Those initially rapid gains inevitably slow down, usually within a matter of weeks.

As soon as the reward diminishes, your brain starts to realize that its prediction was wrong—the work isn’t leading to the same level of reward.


When your brain sees fewer results than it expected, your dopamine levels nosedive and your motivation to train goes along with them.

If your goals are tied to things that don’t always improve quickly, it’s only a matter of time before you stop working toward them.

So, what kind of goals should you set?

There are two kinds of goals, and both of them are important.

The first is an outcome goal, and this is what you ultimately want to achieve. This might be “Lose 20 lbs” or “Increase my bench press by 20 lbs,” or “Get at least 8 hours of sleep each night.”

The other kind of goal is a process goal, and this focuses on the behaviors required to reach an outcome goal.

For example, if your outcome goal is to lose 20 lbs, then there are a series of steps around being active, eating, training, and recovering that will ultimately determine whether you reach that goal.

In the last lesson, you identified your biggest recovery roadblocks.

This is your outcome goal, what you’re ultimately trying to change or improve.

The way to steadily make progress toward your goal without losing motivation is to shift your focus away from your long-term outcome goal—like sleeping better, eating healthier, or losing weight—and toward the process of achieving them.


Whether it’s getting in enough steps, doing the workout you planned, avoiding caffeine after a certain time, or anything else, you can stay motivated simply by concentrating on achieving these very short-term goals.

The power of progress

Set a goal you can achieve each day and make it small and practical.

Take advantage of the dopamine reward system and give yourself the gratification of accomplishing something each day.

This will keep your motivation strong and your focus trained on what you can control.

Nothing will dampen your drive to change more than failing to meet your expectations.

Action step:

Write out your outcome goal—the single area of your recovery you want to improve.

Then detail the steps you need to take each day to reach that goal.

Once you’ve identified 2-3 key process goals to help you reach your outcome goal, answer the following questions:

  • What are you going to measure to track your process goals?
  • How will you track them? (Excel, daily checklist, etc.)
  • How often will you track them?
  • What will you look for to identify progress or setbacks?

Now that we’re nearing the end of the recovery challenge, you have an arsenal of tools and strategies to boost your recovery.

It’s time to start thinking of your recovery as a trait you can program and train for, just like fitness.

And the foundation of any good program is a thoughtful assessment: The Morpheus Recovery Screen, in this case.

You need to know the answer to “What is the biggest thing limiting my recovery?

This will help you develop a clear recovery goal that you can build a well-planned recovery program around—which we’ll talk more about in the final lessons.

How to assess & identify your recovery roadblocks

As you know by now, there are many factors influencing your recovery. That’s why the Morpheus Recovery Screen assesses each of the core lifestyle contributors to recovery:

  • Movement/activity
  • Training
  • Nutrition
  • Sleep
  • Regeneration

You can probably guess what your recovery roadblocks are already. But it’s still helpful to have an objective scoring system so you can track your progress over time.

Take a few minutes to answer the questions below and write down your scores for each section.

Any section with a total score that’s less than 8 is an area that can use improvement.


Which recovery roadblocks should you fix first?

You may have multiple sections with scores less than 8. That’s ok.

Remember that when it comes to changing behavior, it’s hugely important to work on just one goal or habit at a time.

Choose what you want to change by identifying what will require the least amount of effort and lead to the greatest fitness benefit.

It’s helpful to revisit the chart from the lesson on habits as you do this:


Once you’ve identified the single recovery area you want to work on, we’ll help you develop a plan to achieve it in the final lessons.

The best way to think of the cardiovascular system is that it’s the body’s aerobic engine. Its job is primarily to pump blood and deliver oxygen throughout your entire body. Without it, you wouldn’t be alive.

At the center of this engine is the heart itself.

Although the heart is composed of a slightly different type of muscle tissue than that of your skeletal muscles, it’s still a muscle nonetheless and capable of becoming bigger, stronger, and more efficient.

In many ways, it’s the most important muscle in your body when it comes to improving fitness, health, performance, and everything in between.

Just as with other muscles, the type of training that you do dictates the changes that happen within the heart as a result. The heart of a marathon runner looks and performs very differently than the heart of a powerlifter.


The marathon runner’s heart has to be capable of delivering a lot of blood with each beat. It has to be extremely efficient.

The heart of a powerlifter, on the other hand, has to be able to support the tremendously high blood pressures, up to 345/245, and force on the body during maximum lifting.

This requires the walls and tissues of the heart to be strong. Efficiency is much less important when you’re training for heavy lifts that only last a few seconds.

How red power intervals work

The reason all this is important to understand is because red max intervals are specifically designed to cause changes in the heart that can up the horsepower of your entire cardiovascular system.

This horsepower is typically measured in terms of how much oxygen your body can use during high level exercise. This number is known as your VO2 max and it’s a very good gauge of your overall aerobic fitness.

The primary goal of red max intervals is to help train the heart to be able to deliver more oxygen by driving it towards the highest intensities. This is where it’s forced to work the hardest, sort of like the equivalent of pushing your heart to its 1-rep max.

By pushing the heart up to the limits of its oxygen pumping potential, it causes changes that improve VO2 max and overall aerobic fitness. The result is that you develop a stronger heart that can power a bigger aerobic engine.


How to do red max intervals

Let me start by saying that red max intervals are not fun. They are extremely demanding because the single most important thing you have to do is drive your heart rate up to its max, or as close to it as you can get it.

You also don’t want to hit your max and then immediately slow back down. The goal is to keep it up towards the top for up to 30 seconds, or more, to really drive the maximum results from this type of interval.

Before you do this, there are two important considerations:

  • Red max intervals are not for beginners. Just as it’s not a good idea to take someone that’s new to lifting weights or coming off a long layoff and start by doing heavy 1-rep max sets, the same applies to heart rate training.  
    You should not include red max intervals in your program until you already have a relatively high level of aerobic fitness. This generally means an HRV in the 80’s and a resting heart rate in the low to mid 50’s.
  • Exercise selection is extremely important. To get up to your max heart rate means only total body exercises will work. Exercises that are seated like rowing or biking will not be as effective because you will not be able to get your heart rate as well. 
    It’s also important to avoid trying to incorporate heavy strength-based exercises or circuit training. These may drive heart rate up, but they will also drive blood pressure much higher as well and this can change the impact on the heart as well.

Each rep of red max intervals should be somewhere between 90-120s depending on how long it takes you to get your heart rate to max, or close to it. Your goal should be to hit the top of the red zone and keep it there for up to 30 seconds or more.

Rest periods should be 4-5 minutes, or until you feel fully ready to drive your heart rate up to max again.

Active rest around the middle of the blue zone is more effective than passive rest, though you may feel the need to sit down or take a complete break for the first minute or two.


It goes without saying that you should be thoroughly warmed up before you do your first rep. It’s incredibly important to focus on maintaining good technique, even as you start to become fatigued.

How to incorporate red max intervals into your program

This type of high intensity training is best reserved for short periods of time, only a few weeks at most. They are particularly effective when peaking for a competition that requires a high level of aerobic fitness.

When you’re first starting out, as little as 1-2 reps is all that’s necessary. As you progress, work up to 3-4 reps per workout. Because the intensity is so high, there is generally no need or benefit to doing higher reps than that.

As with other high intensity methods, red max intervals should be incorporated into your program a maximum of 1-2 times per week, with at least 2 days between them.

When these guidelines are followed, they may not be fun, but they are an incredibly powerful way to increase the horsepower of your aerobic engine and boost your performance in a short period of time.

To understand the benefits of threshold training, we have to take a minute for a mini-lesson on how our body turns glucose (blood sugar) into ATP – the energy currency all our cells run on.

Don’t worry, it’ll be a short lesson and there’s no quiz at the end.

The first step of this process is known as glycolysis. Because there are only a few chemical steps and it doesn’t require oxygen, it’s a relatively fast process.

The downside, however, is that it also doesn’t produce very much ATP.

Along with the ATP, the other main end product of glycolysis is another molecule called pyruvate.

The next step is where things get interesting.

When your body has enough oxygen being delivered to your muscles, pyruvate is transported into your mitochondria (the energy power plants in your cells) and sent through a much longer series of chemical steps.

These steps are relatively slow, but they produce a lot of ATP.

When there is not enough oxygen available, pyruvate instead ends up as a different molecule called lactate—often used interchangeably with lactic acidemd .

Though there is some debate within the scientific community as to whether or not lactic acid ever technically forms in cells, it’s universally agreed upon that lactate is not what makes you tired or sore.

Instead, lactate is transported from the muscle cells that don’t have enough oxygen into other muscle fibers and even places like the heart, where oxygen is much more abundant.

With oxygen, lactate is then used to create more ATP.

So to recap:

  • When your body breaks down glucose aerobically (with oxygen) you end up with a lot of ATP, but it’s a slow process because there are a lot of chemical steps that have to happen.
  •  

  • When your body breaks down glucose anaerobically (without oxygen), it’s a much faster process, but it only produces a relatively small amount of ATP. At the same time, this process also leads to the formation of lactate.

What is the anaerobic threshold, anyway?

Hopefully you followed along with my little chemistry lesson, because it makes the concept of the anaerobic threshold much easier to understand.

The main thing to know is that at relatively low to moderate intensities, the body is able to generate all, or at least most, of the energy it needs aerobically because it has enough oxygen available to turn both fat and glucose into ATP.


As intensity and the demand for energy increases, at some point, the body has to start to tap into the anaerobic side.

As an example, let’s say your body can produce enough oxygen to allow you to run at 8mph purely through aerobic metabolism.

When you have to run 9, 10, or 11 mph, your body has to get the extra energy from the anaerobic side through glycolysis.

When this happens, the amount of lactate in the blood starts to increase.

All this really means is that more and more glucose is being broken down anaerobically and the aerobic system can’t keep up.

The faster you run, the more anaerobic energy you’ll need and the faster lactate will start to accumulate in the blood.

The point at which there is a rapid increase in lactate above a certain level is what is known as the anaerobic threshold. Because it’s based on lactate levels, it’s also often referred to as the lactate threshold.

Regardless of what it’s called, the simplest way to think about the threshold is that it’s the tipping point where lactate accumulates because the aerobic system isn’t able to produce as much energy as you need by itself.

As you hit the threshold and above, your body is producing an ever increasing amount of energy from the anaerobic side of the equation.

This is important because the simple and unavoidable rule of our biology is that the more we have to rely on anaerobically-driven energy, the faster we fatigue.


The anaerobic threshold and performance

All things being equal, if you have a higher anaerobic threshold, it means you have better aerobic fitness and you’ll be able to sustain higher speeds and generate more power for longer.

A person with an anaerobic threshold of 180bpm will generally be able to hold a higher pace than someone with a threshold of only 150bpm, for example.

This is why how fast someone can run at their anaerobic threshold is one of the best predictors of performance in endurance sports. Far better than another common aerobic marker, VO2 max.

An important thing to note, however, is that even though a single heart rate or speed is commonly used to denote the threshold, this is a bit of a misnomer that’s based on older research.

There is not one single heart rate where all of a sudden your energy production shifts dramatically. Instead, it’s more accurate to think of a heart rate range where this occurs rather than at a single point.

Where is your threshold?

The goal of the threshold method is to help improve your aerobic fitness to the point that it requires less energy from the anaerobic energy pathway to produce the same speed or power.

If you start out being able to run 9mph at your threshold for example, you’ll quickly fatigue after a few minutes there. Even faster if you go up to 10mph, 11mph or more.


If you are able to improve your aerobic fitness and increase your speed at your threshold up to 11mph, then you’d be able to sustain that same 9mph for much longer than before.

One of the most effective ways to train to develop this ability is to train within the range of your anaerobic threshold.

The main challenge with this, however, is that trying to determine exactly where this is requires getting tested in a lab and even then, it’s not as much of an exact science as many people make it out to be.

Your threshold also changes dramatically depending on the exercise that you’re doing.

Fortunately, unless you’re a competitive endurance athlete, it’s not really necessary to get an exact threshold anyway. The Morpheus heart rate zones were designed to help you train at intensities around your threshold without the need for specific testing.

To do this, make sure you’ve selected the right fitness level and either input your max heart rate, or let Morpheus do this for you. In the same settings, you can enter your threshold if you do know what it is, but if not, simply leave it blank.

From there, you can do two levels of threshold training: green and red.

For most people, as long as their recovery score is somewhere between about 85-95% recovery, then training around the top of the green zone will put them just below or at their threshold.

This should be a pace that’s challenging, but one that’s sustainable for up to 10-15 minutes without significant fatigue.

Moving up to the bottom of the red zone should then be just above their threshold. This should be a pace that’s generally sustainable for much less time, more like 3-5 minutes, before fatigue starts to set in and forces you to slow down.

How to incorporate threshold training into your program

As with other higher intensity methods, this type of training is best suited for people that already have a foundation of fitness to begin with. Very generally speaking, this means an HRV in the mid-70s or above in Morpheus.

If you’re below that, just starting out, or coming back from a layoff, lower intensity methods should be used first.


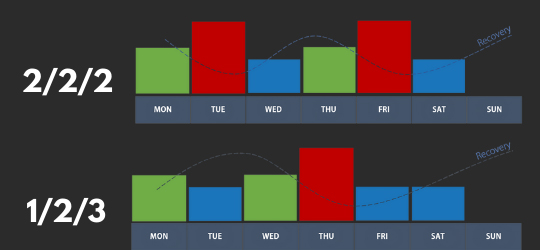
Threshold training is effective when it’s done 1-2 times per week. This is often the right frequency to stimulate the body to improve, without pushing it to the point that it can’t recover.

When doing green thresholds, a good total range within a workout is typically between 10-30 total minutes. This can be broken up into intervals of anywhere from 5-10 minutes at a time, with 2-3 minutes of active recovery in between.

Because red thresholds are higher intensity, you’ll want to shoot for less total time. Anywhere from about 5-12 total minutes per workout is all you need.

You’ll want to break these up into shorter intervals as well. Alternating 2-3 minutes of work with 1-2 minutes of active recovery is a good guideline to start with.

To understand power-endurance, we need to look at the legendary Usain Bolt.

Most people think of him as the fastest human of all time, which he undoubtedly is.

But what people don’t realize is that it’s not just his top speed that makes him so incredibly unique. Instead, it’s his ability to slow down just slightly less than everyone else.

In the 100m race, athletes hit their top speed well before the finish line. Usually around 7 seconds in or so. After that, it’s a matter of who can slow down the least.


He wasn’t just incredibly fast. He was also incredibly good at slowing down slower than everyone else. This is what truly set Usain Bolt apart and it’s what defines power-endurance.

It’s not just in sprinting that the difference between winning and losing can come down to the thinnest of margins. The ability to generate that last bit of extra performance when you need it most is what often separates the very best from all the rest.

From a fitness standpoint, the quality that’s often the most important to be able to do this is power-endurance.

This is the ability to maintain your explosive power as long as possible before fatigue sets in and you slow down.

Although there are limits to how much power you can sustain over time due to the nature of producing energy anaerobically (without oxygen), it can still be noticeably improved through training.

One of the best ways to do this is through power-endurance intervals.

Why we can’t be like Superman

Being able to stay in your high gear just a few seconds longer primarily comes down to how well your body can handle the stress that comes with producing a lot of energy anaerobically.

As we talked about in yesterday’s lesson, the body can produce energy aerobically, with oxygen, or anaerobically, without oxygen.

The aerobic system is always producing energy 24/7, from the moment you’re born throughout your entire life. It is incredibly efficient and it can turn proteins, carbs, and fat all into energy.

When it needs to generate more power than the aerobic system is capable of, that’s when it turns to the anaerobic side of things.


This is what makes the body capable of lifting hundreds of pounds of weight and sprinting at 20 miles an hour or more.

The cost of this, however, is fatigue.

If you think about it, there’s a good reason our bodies work like this.

Imagine if you could run an entire mile at the same speed you can hit in a 10 second sprint. Or if you could squat 100 reps with your 1 rep squat max.

Even if this were possible, the amount of stress you’d put on all your tissues and joints would be immense. The real world isn’t a superhero movie and ultimately, it wouldn’t take long before things would break.

Fortunately, we have a built in safety mechanism that prevents this from happening.

The more we use the anaerobic energy systems and the faster we generate energy, the more rapidly we fatigue and become forced to slow down.

The way power-intervals work is to train the body to slow down that fatigue just enough for us to squeeze out a few extra seconds of performance.

They can’t override how our body fundamentally works, but they can help us generate as much power as possible before we slow down.


How to do red and green power-endurance intervals

Both types of power-endurance intervals are extremely similar to the power intervals we covered in the previous lesson. The only real difference is in the times that are used for both the work and the rest periods:

  • Green power-endurance intervals: 10-15s work @100% : 60-90s rest at the top of the blue zone.
  • Red power-endurance intervals: 30-45s work @100% : 90-180s rest at the top of the blue zone.

The overall work to active rest ratio is shifted towards relatively longer work and shorter rest periods. You’ll also notice that the active recovery is at the top of the blue instead of the middle.
This is to focus on training those extra few seconds of power and help the body get used to handling the stress of relying more on the anaerobic energy systems.

Unlike with the power intervals covered in the previous lesson, you should start to feel more and more fatigued with each rep. Pushing yourself towards the edge of your endurance is the most effective way to improve it.

When it comes to choosing exercises, the same guidelines covered in the green and red power intervals apply. You want total body exercises that are capable of driving your heart rate up.

It’s also best to try to avoid exercises that put too much stress on your joints or that are highly technical in nature. Choosing the right exercises will help you avoid developing bad habits as you fatigue and reduce your risk of injury.


How often should you do them?

An important thing to note is that this type of interval is high intensity, very demanding, and best suited for someone that already has a good base of fitness and movement capacity.

If you’re just starting out or you haven’t done any conditioning for some length of time, power-endurance intervals are not the place to start.

WIth that in mind, you can start off incorporating power-endurance intervals into your workout as little as one day a week, but generally two, spread a few days apart, will be the most effective.

They should only be done as part of your green or red workouts.

They can be done with weights in the same workout, but in that case, it’s best to do the intervals first if your goal is to improve your conditioning.

Doing them after you’re already fatigued from lifting will potentially make them less effective and likely slow down your recovery.

A good number of sets is anywhere from as little as 2 and as many as 5-6 depending on your fitness level.

When you’re first getting started, stick with the lower end of the work times and the higher end of the rest guidelines. Each week, add a few more seconds of work in each rep until you get to the higher end.

From there, start to reduce the rest intervals by a few seconds at a time until you’re on the lower end.

A good amount of time to include power-endurance intervals in your program is typically between 4-6 weeks. Just as with the power intervals, it’s normal to see your HRV decrease a bit when you first start incorporating them.

Look for your HRV rebound back up in the following weeks as your power-endurance improves.

You don’t have to be an athlete to want to increase your power.

Even if you aren’t training for performance, there are a range of benefits from tapping into your nervous system to fire as many muscle fibers as possible.

Being able to do this is one of the key drivers of generating explosive power and it only comes through training.

Although there are many different types of training that can help you develop this ability, interval training has traditionally not been one of them.

The reason is because the way most people do interval training quickly leads to fatigue. For a lot of people, fatigue is a measuring stick of whether or not the intervals are effective in the first place.

The problem with this is that at the simplest level, fatigue is the opposite of power.


Power comes contracting as many muscle fibers as possible, at all once, in a synchronized manner. It’s driven largely by the anaerobic energy systems.

Fatigue, on the hand, is what happens when your biggest, strongest, and most powerful muscle fibers stop contracting.

That’s the reason you slow down and your power output decreases in the first place. You have fewer muscle fibers firing.

That’s not a recipe for becoming more powerful.

How do power intervals work

There are two different types of power intervals, green power intervals and red power intervals, but they both work in the same way.

Unlike a lot of other interval methods, they use a work period that’s much shorter than the rest period.

The goal is not to become fatigued. It’s to be as explosive as possible in each and every rep. This requires more rest and less work than most people are used to when they do intervals.

This is the only way to tap into your entire range of muscle fibers and train both your nervous system and your energy systems in the process.

The other key to power intervals is to focus on the rest period itself. Rather than passive recovery, where you just sit there and wait to go again, power intervals use active recovery.

This helps speed up your recovery in between reps and maintain your power more effectively.

Green Power intervals

Green power intervals are designed to help develop your top end power output. This is driven by what’s called the anaerobic-alactic energy system.

This is your most explosive system, but it’s also the most limited. It can only produce maximum power for a few seconds at a time before it starts to rapidly decline.


Because of this, you’ll want to keep the work period to between about 5-10 seconds. The key is that these few seconds need to be at 100% intensity.

If you go anything less than maximum, you won’t tap into the top end muscle fibers that only come into play when you really need them.

As long as you’re doing this, you should see your heart rate spike up into the green during each of the work periods of the interval.

As soon as each 5-10 seconds of max power is over, try to drive your heart rate back down to the middle of the blue zone as fast as possible to start your period of active rest.

During this phase, you can do a variety of things, ranging from a slow jog to jumping on the bike, jumping rope, etc. The most important thing is just being active to keep your blood flow up and speed up recovery between reps.

The middle of the blue zone is where you should get to and stay for a total active rest period of about 40-60s before doing another rep.

Anywhere from 5-12 reps is the recommended range of green power intervals.


Red Power intervals

Red power intervals use the same principles as green power intervals, the main difference is that they are focused more on developing the anaerobic-lactic energy system.

This means they are a bit longer, around 20-30 seconds during the work period, and 2-3 minutes in the middle of blue during the active recovery phase.

Because you’ll be going at 100% during the work period, you should expect to get up into your red zone.

Although these are challenging intervals because of this, the 2-3 minutes of active rest is designed to prevent you from becoming fatigued to the point that you start significantly slowing down with each rep.

If you feel this happening, increase the rest interval. Remember, fatigue may be a byproduct of training at high intensity, but it is not the goal of it.

You can start with as few as 2-3 reps of red power intervals and work up to as many as 5-8 over time.

What kind of exercises should you use?

Many different types of exercises can be used for both green and red power intervals. The best ones are total body exercises like sprinting because they use the most muscle.

Various pieces of cardio equipment like the Versaclimber or Jacob’s Ladder also provide a great low-impact solution as well.

If none of those are an option, you can do explosive bodyweight exercises like squat jumps, burpees, etc.


If you choose to use strength training exercises, make sure to use ones that generally do not require a very high level of technical proficiency to do correctly and safely.

Doing a technically demanding lift at 100% intensity for up to 20-30s seconds is a good way to develop bad movement patterns and increase the risk of injury.

If you’re an athlete, sport-specific drills can be used effectively as well.

How often should you do them?

Both green and red power intervals should be included between 1-2 times per week when improving your power is the goal.

Because of their high intensity and the need to go at 100% to get the most out of them, they are most suited for your red workouts.

Although there are exceptions, it’s generally more effective to include either green or red power intervals within a training program, not both. This helps keep your focus on improving one specific area of fitness at a time and is likely to lead to the best results.

When you first start incorporating these types of higher intensity intervals into your program, it’s common to see a drop in HRV during the first 1-2 weeks. As long as you’re allowing yourself to recover, you should then see a rebound in the following weeks.

Today we’re going to dive into a moderate-intensity interval method called Tempo Intervals.

Despite the fact that very few people know about them, Tempo Intervals have been around a long time. They were originally popularized in the track and field world by a world-renowned coach named Charlie Francis in the 1980’s.

So, why would a track coach training some of the fastest athletes on the planet use a relatively low speed, moderate-intensity interval on a weekly basis with all of his sprinters?


Simple: He wasn’t using Tempo Intervals to increase speed, he was using them to increase recovery.

And anyone can enjoy the benefits of Tempo Intervals—especially when you do them the day after a high intensity workout—which include things like:

  • Feeling less tired and sore after a workout
  • Being able to train at higher volumes without overtraining
  • Decreased rates of lower body injuries
  • Reduced soreness and improved mobility

How do tempo intervals work?

The main reason tempo intervals are an effective way to promote recovery is precisely because they are done at a moderate intensity.

This is the sweet spot because it allows you to recruit higher threshold muscle fibers than you would at lower intensities, but they don’t lead to the same level of stress and fatigue as higher intensities.

By hitting this middle ground, they drive blood flow and oxygen to promote recovery, while helping to build your general aerobic fitness at the same time.

The key to doing tempo intervals

The basics of a Tempo Interval are to do 10 seconds of work at a moderate intensity, followed by 60 seconds of active recovery. Then repeat for a total of 10-20 minutes.


The key to doing them properly is the intensity, and this is where most people get them wrong: ⁣

⁣Too much intensity, and they can actually slow down recovery.⁣

⁣Too little intensity, on the other hand, and they just aren’t effective.⁣

⁣Aim for about 70% of your max level of exertion during the work intervals, and you’ll be right on target.

If you aren’t sure what 70% feels like, the best way to find out is to start with an exercise where you can measure how far you can go in 10 seconds. Start with a max effort test, and then shoot for about 70^% of that distance when you’re doing tempo intervals.

Another good guideline is that you should be able to cover the same distance in your last rep as you did in your first rep. In other words, if you’re slowing down as you’re doing them, then the intensity is too high.

On most days, the majority of the intervals should be in the blue zone.

What kind of exercises should you use?

Part of the beauty of this method is how extremely versatile it is.

From battle ropes to med ball throws, to jumping rope, and everything in between, you can use just about any exercise that will allow you to reach that 70% max exertion mark.

Once you get a feel for what 70% feels like, it’s easy to hit this target in a variety of exercises.

How often should you do them?

How often you should do Tempo Intervals depends on your recovery each day and your program. These are perfect for your blue workout days for either the 2/2/2 or 1/2/3 model we talked about in the Train, Recover, Repeat lesson. They can also be used during the warm up on your green or red days.

It’s particularly useful to do this type of training when Morpheus shows your recovery score dropping below 80% as they can help boost it back up as part of a recovery workout.